


TotalBoat TableTop Epoxy
- Durable, resistant coating for bars, counters, and tabletops
- Great for shallow casting and molding applications
- Easy to pour, great self-leveling properties for smooth, glassy surfaces
- Create high gloss layers up to 1/4" deep
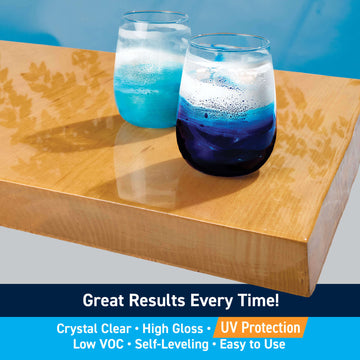
- Crystal-clear, UV-resistant formula that won’t yellow
TotalBoat TableTop Epoxy allows you to create beautiful yet durable coatings on bar tops, counters, tables, and more! The 2-part formula is easy to measure, mix, pour, and spread with a 1:1 mixing ratio and superior self-leveling properties. Clear coat surfaces up to 1/4" or pour in shallow molds for coasters, jewelry, and more. Tint with mica powder, alcohol inks, and pigment dispersions for a creative twist. Once cured, the glassy finish is 100% waterproof and resistant to scratches, stains, and heat. Includes UV protection to prevent yellowing and discoloration from sunlight.
Very Important: To ensure the best results, please read all directions before mixing or pouring.
Product Information
Cleaner / Surface Preparation
Denatured alcohol, acetone only for use on compatible substrates.
Cleanup
- Part A — Epoxy Resin: Denatured alcohol or acetone
- Part B — Hardener: Warm, fresh water and a mild soap, or denatured alcohol
- Resin and Hardener Mixed: Scrape up and remove any uncured material, as needed. Denatured alcohol, lacquer thinner, or acetone may be used to clean up uncured, mixed epoxy. Cured epoxy must be removed mechanically.
Thinner / Reducer
Do NOT thin this product.
Colorants / Tints
Epoxy-compatible dyes, colorants, or special effects additives can be added and mixed in. Only use products designed for use with epoxy.
Important: Always perform a small test with TableTop Epoxy and any colorants, dyes, or other special effects to ensure that it achieves the desired results.
Mold Release Agents
When making small castings, it is recommended to use a mold release paste wax, or an appropriate aerosol mold release agent for epoxies. This will preserve the mold and extend its useful life.
Coverage
- Seal Coat: Roughly 24 sq. ft.
- Flood Coat of 1/4": 6.4 sq. ft. per 1-gallon kit
- 1 ounce of mixed epoxy covers roughly 6.5 sq. inches @ 1/4" thickness.
- Actual coverage depends on multiple factors, including surface area, pour thickness, absorption into porous surfaces, and material waste.
Safety and Personal Protective Equipment
Always use proper safety equipment, clothing, and PPE in accordance with the Safety Data Sheet for each component.
Exothermic Reaction
The cure of TotalBoat TableTop Epoxy is an exothermic reaction and will generate heat. It is not uncommon for a mass of mixed epoxy left in a mixing cup beyond the working time to reach 200–300°F during the cure cycle.
Surface Preparation
- All surfaces must be clean, dry, and free of contamination. Contaminants include, but are not limited to, dust, oil, moisture, lint, sap, and sanding debris.
- Do not use paper towels, dirty rags, contaminated sandpaper, or touch the surface with oily fingers.
- Sand, as needed, and remove all sanding residue. Wipe the surface down with a clean, dry cotton rag dampened with one of the approved surface preparation solvents.
- DO NOT use a tack cloth.
Wood and Other Porous Substrates
- Apply a seal coat: ALWAYS apply a seal coat before flood coating. Start with a prepped surface, clean, dry, and free of contamination.
- Apply a thin coat of mixed epoxy. Knots or indentations may take more material to seal.
- Take care to cover and seal any voids or cracks. Allow the seal coat to cure to a rock-hard solid and sand with 80- to 120-grit sandpaper, paying careful attention to imperfections such as air bubbles.
- Wipe clean with denatured alcohol and a clean cotton rag.
- The purpose of a seal coat is to minimize the effects of off-gassing by creating a thin, air-tight barrier between a porous wooden surface and the TableTop Epoxy flood coat, so air bubbles won’t rise up through the curing epoxy to create unwanted cosmetic defects.
Application Conditions
- The optimal ambient environmental conditions are 70°F and 60% or lower relative humidity.
- All epoxy materials and the workspace should be maintained at 65–80°F during the whole application and cure process. Epoxy is a temperature-sensitive material.
- When cool, it’s thicker, is harder to self-level, and cures slower.
- When warm, it is thinner, has better self-leveling, and sets faster. If the material or working conditions are below 65°F, TotalBoat TableTop Epoxy may become too viscous to properly release air bubbles.
- Working in conditions or with material above 80°F, TableTop Epoxy may set too quickly, which can generate excessive heat during the cure, leading to yellowing, distortion on the surface, or cracking.
Dispensing & Mixing
- The mix ratio for TotalBoat TableTop Epoxy is 1 part epoxy resin to 1 part hardener (1A:1B), by volume, or 1.2 parts resin to 1 part hardener (1.2A:1B), by weight.
- Using the specified mix ratio is VERY important when working with epoxy.
- DO NOT deviate to speed up or slow down the gel time.
- An excess of resin or hardener will not speed up the reaction. It will negatively affect the cure and could cause a wide range of short- and/or long-term problems with your epoxy coating.
Maximum Mixing Quantity
- ONLY mix what you intend to use within the next 20 minutes — this is the safest approach.
- It is also advisable to not mix more than one gallon of epoxy at a time to ensure the best quality of mixing.
- For larger projects, step-pour multiple pours.
- Exceeding these maximum mixing quantity recommendations could cause the epoxy to generate excess heat, dramatically shorten the working time, and begin to cure in the mixing cup faster than expected.
Adding Tints and Colorants
- Only use epoxy-compatible tints or colorants with TotalBoat TableTop Epoxy.
- These can range from dyes, inks, tints, alcohol inks, pigment dispersion systems, mica powders, or other special effects.
- It is strongly recommended to perform a small test with any tints or colorants before using them on the final project.
- Cure the sample completely to see if it achieves the desired results.
- ONLY add these tints/colorants after the resin and hardener have been mixed completely.
- Tints and colorants can be added at any time during the working time of the mixed epoxy.
Mixing Technique
- The best practice is to combine the resin and hardener at the specified mix ratio, mix for a minimum of 3–5 minutes while scraping the sides and bottom of the container until there are no streaks or striations, transfer to a second container, and mix 2–3 more minutes until fully blended.
- There should be no streaks or striations visible when it has been sufficiently mixed.
- Stir slowly to avoid whipping excess air bubbles into the epoxy while mixing.
- DO NOT use a drill mixer for mixing TableTop Epoxy.
- If any tints or colorants are desired, they can be added now. Let it sit for 1–2 minutes to allow air bubbles to start rising to the surface, then apply immediately.
- The whole mixing process shouldn’t take more than 8–10 minutes.
Application
Coating Application Thickness
- Apply TableTop Epoxy at a maximum thickness of 1/4" per coat.
- When creating coatings thicker than 1/4", pour TableTop Epoxy in layers of 1/4", allowing a minimum cure time of 3 hours between coats.
- Sanding is not required between coats.
- Exceeding the maximum coating thickness may cause excessive heat from the cure reaction.
- Signs of excessive heat from the cure include distortion or little waves on the surface, yellowing, and cracking.
Small Castings
- TableTop Epoxy can be used for small castings with a maximum pour depth of 1".
- At this depth, do not exceed 6 fluid ounces of mixed epoxy per pour.
- Casting greater amounts than this in a single pour at this thickness may experience cracking, yellowing, streaking, excessive shrinkage, or other undesirable effects from the heat generated during the cure.
- Pour in multiple layers of 1/4" when casting more than 6 ounces of epoxy, allowing a minimum of 3 hours between layers.
- When embedding objects, it may be helpful to pour in layers, as the objects may tend to sink or float. Pouring in layers can control this tendency, giving the desired effect.
Helpful Hint: If a pressure pot is available, place the casting in a pressure pot until the epoxy has cured. For best results, increase the pressure to 50 psi during this time to alleviate all bubbles from the casting.
Working Time
- The pot life of this product is roughly 20 minutes, while the total working time is 40 minutes at 70°F.
- The working time of any epoxy is the time that it can be poured, worked, or applied after mixing. The working time also includes the epoxy’s pot life — which is how long it may tolerate being left in the mixing cup before abruptly heating up and curing.
- The most efficient way of using epoxy is to pour it to the desired location immediately after mixing to maximize the working time.
- Epoxy is a mass- and temperature-sensitive material.
- Factors such as material temperature, ambient temperature, amount mixed, mixing time, and mixing speed can influence the pot life and working time.
- The more you mix, or the warmer it is, the faster it will begin to react, warm up, and thicken.
- If the mixed epoxy starts to heat up in your mixing cup, apply it immediately.
Pouring
- Coating Applications: Pour the mixed TableTop Epoxy onto the surface in an S-shaped pattern.
- Using a plastic spreader or straight-edge tool, spread the epoxy evenly over the entire surface, pushing epoxy to the edges.
- Do not apply the epoxy thicker than 1/4" per coat.
- Small Castings: Pour the epoxy slowly in one location, avoiding any cascading or inducing any unnecessary bubbles. Allow the mold to fill slowly from this single point.
Removing Bubbles
- Once poured into the desired location, let the epoxy sit for 10 minutes to allow air bubbles to rise to the surface.
- Remove the remaining bubbles with a heat gun or propane torch.
- Apply heat 6–8 inches above the surface, moving constantly in a back-and-forth motion.
- Avoid heating one spot for more than a few seconds. Overheating the epoxy can scorch or burn the surface causing permanent surface imperfections.
- Take care, as these methods to remove bubbles can move around colorants, tints, or other special effects, potentially changing the appearance.
- Check periodically for additional bubbles, and remove as needed, but do not overwork isolated areas.
Cure and Finish
When Applied as a Coating: Cure times when applied at 1/4" thickness at 70°F: tack free in 6 hours, sandable if necessary in 24 hours, ready for light use in 48 hours, and fully cured for full use in 5–7 days.
- Thinner coats or cooler conditions will require more time to cure, while thicker layers, or warmer conditions can shorten these cure times.
Castings: Allow a minimum cure time of 24 hours before demolding.
- Avoid demolding sooner than necessary.
- Castings may need to be supported for 3–5 days as they may sag or settle slightly until they have finished curing.
Finish:TableTop Epoxy cures to a high-gloss finish. If there are blemishes from casting or scratches over time, it can also be wet sanded and buffed to a mirror finish, removing any surface imperfections or scratches that have occurred. Allow TableTop Epoxy a minimum of 5–7 days to cure before wet sanding and buffing.
- When exposed to extreme UV exposure, a clear urethane or varnish should be applied to the surface to prevent the epoxy from yellowing over time.
Troubleshooting
Mistakes can happen, no matter what your skill level is with epoxy. Here are some of the most common problems, causes, and solutions for troubleshooting issues with TotalBoat TableTop Epoxy.
Bubbles
- Temperature: If the environmental conditions or the epoxy being mixed are below 60°F, this can render the mixed epoxy too thick to release air bubbles and self-level properly.
- Coating Thickness: Applying TableTop Epoxy thicker than the 1/4" maximum will make it more difficult to release air bubbles, even with a heat gun or torch.
- Seal Coat: ALWAYS apply a seal coat to wood or porous substrates before applying a flood coat. Without a seal coat, air bubbles will constantly rise up from the grain and get trapped in the epoxy as it cures. Using a torch or heat gun will not remedy this, it will only become worse.
- Mixing: Mixing too vigorously may whip excessive air bubbles into the blending resin and hardener. This can make the mixture look white, or have thousands of tiny bubbles. The smaller the bubbles, the harder it is for them to rise to the surface and pop naturally.
Fisheyes
- Fisheyes are a surface defect caused by surface contamination. Oil, wax, dust, moisture, and sap are just a few contaminants.
- Even in small amounts, these can repel the epoxy, forming small, isolated areas without epoxy.
- Small fisheyes can be filled with a clear CA-glue such as TotalBoat TotalBond, or a clear UV-cure resin such as TotalBoat UV Cure Clear Resin.
- Make sure any products used to remedy the fisheyes have fully cured and been sanded with 220-grit sandpaper before applying another coat of TableTop Epoxy.
Surface Imperfections
- Let the epoxy surface cure to the point it can be sanded after 24 hours.
- Lightly sand trouble spots with 120–220 grit sandpaper.
- Clean away sanding debris and wipe with a clean cotton rag soaked in denatured alcohol.
- Mix a small amount of TableTop Epoxy and fill in the freshly sanded trouble spots. This can also be done with clear super glue or TotalBoat UV Cure Clear Resin for a quicker fix on very small imperfections such as fisheyes.
- Once the repair has cured, lightly sand the entire surface and apply another thin, uniform coat to the entire surface.
Epoxy Did Not Cure Properly
- Improper Mix Ratio: Verify that the proper mix ratio was used — 1:1 by volume, OR 1.2A:1B by weight. Mixing too much of either component may cure to a sticky or soft material.
- Resin and Hardener: Make sure you used resin and hardener; not all resin or all hardener. They need to be mixed together, one does not get poured before the other, as stand-alone layers.
- Not Mixed Thoroughly (This Is the Most Common Issue): While mixing, be sure to scrape the sides and bottom of the mixing container to ensure all resin and hardener are fully blended. THE 2-CUP MIXING METHOD IS STRONGLY RECOMMENDED as described in the MIXING section. Failing to mix this product thoroughly can and will result in soft spots in the coating.
- Pouring: NEVER scrape or brush the sides or bottom of the container you just mixed in to remove every last drop. No matter how thoroughly you may have mixed, there will always be an unmixed portion which can be dislodged and will leave a wet or sticky spot on your coating. The 2-cup mixing method, clarified in the MIXING section, will also help to prevent this issue.
- Temperature: If the temperature is below 60°F while TableTop Epoxy is initially setting up, it can dramatically slow the chemical reaction needed for the development of the epoxy’s final hardness. Increasing the ambient temperature to at least 80–90°F for 12–24 hours should help to revive the chemical reaction for hardness to develop.
- Incompatible Tints, Colorants, Additives: Only use compatible tints, colorants, pigment, or special effects that are compatible with epoxy. ALWAYS perform a small test sample to ensure compatibility.
Crystallization
- Crystallization can make liquid epoxy resin appear cloudy, chunky, grainy, or even solid.
- Under most circumstances, this is due to improper storage conditions. Do not use crystallized epoxy.
- Crystallization is not permanent, however, and can be reconstituted to its original state for normal use.
- Heating the resin throughout the container to roughly 125–140°F will return the crystallized material to a clear liquid.
- The most common method of achieving this is placing the bottle of epoxy into a warm water bath.
- Seal the bottle very thoroughly, or place it in a sealable bag, then place it in a tub or basin of warm water.
- Change out the water, as needed, to maintain the temperature at 125–140°F.
- Shake or stir the resin in the bottle periodically to help maintain an even temperature through liquid epoxy.
- Once the epoxy crystallization has been fully decrystallized, it is safe for use again, because it has been restored to its original working and physical properties.
Product Storage
- Store between 60–90°F, in a dry place, tightly sealed to prevent any moisture or contaminants from coming in contact with the liquid epoxy material.
- Maintain a consistent storage temperature.
- Do not allow TotalBoat TableTop Epoxy components to freeze during winter storage.
- After use, ensure that all containers are tightly sealed.
- During cold weather, store products on a raised surface off the floor, and avoid storing near outside walls or doors.
Shelf Life
The shelf life of TableTop Epoxy is a minimum of one year, under proper storage conditions. However, it is typically viable for a significantly greater amount of time if stored properly.
Application Data
| Application / Epoxy Type | Coating, small castings |
|---|---|
| Maximum Pour Depth | Up to 1/4" per coat (coatings); up to 1" (castings up to 6 fl. oz.) |
| Coverage | 3.2 sq. ft. at 1/4" per 2-quart kit; 6.4 sq. ft. at 1/4" per gallon kit; 12.8 sq. ft. at 1/4" per 2-gallon kit |
| Number of Coats | As many as desired |
| Application Temperature / RH | 65–80°F, 0–60% relative humidity |
| Pot Life | 20 minutes at 70°F |
| Working Time | 40 minutes at 70°F |
| Gel Time (150g mass) | 72 minutes at 77°F |
| Cure Time Between Coats | 3 hours minimum at 70°F — no sanding required |
| Minimum Cure for Use | 3–5 days |
| Full Cure Time | 5–7 days |
| Resin Density | 1.15 g/cm³ at 77°F |
| Hardener Density | .95 g/cm³ at 77°F |
| Resin Viscosity | 8,100 cP at 77°F |
| Hardener Viscosity | 1,820 cP at 77°F |
| Mix Ratio (By Weight) | 1.2A:1B |
| Mix Ratio (By Volume) | 1A:1B |
| Mixed Viscosity | 2,250 cP at 77°F |
| Shelf Life | Minimum of 1 year under proper storage conditions |
Physical Data
| Cured Color / Finish | Crystal clear, high gloss |
|---|---|
| Components | Two — Epoxy Resin (Part A), Hardener (Part B) |
| Units | 2-Quarts, 2-Half Gallons, 2-Gallons |
| UV Stable | Yes |
| HDT | 118°F |
| Cured Density | 1.05 g/cm³ |
| Water Absorption | Less than 0.1% |
| Hardness | 82 Shore D |
Comments
0 comments
Please sign in to leave a comment.