





















The hand layup process involves using resin to wet out reinforcement fabric, then applying the fabric to a prepared surface.
To prevent air pockets and shifting layers, we recommend you wet out the fabric on a separate surface before transferring it to the prepared boat surface or male/female mold. This "wet" method saturates the cloth thoroughly without stretching it and maintains the ply orientation to produce a high-strength laminate free of resin-rich or resin-starved areas.
The alternative is to lay the dry material directly on the boat or mold surface and wet it out there. This "dry" method is ok for smaller pieces of laminant or for persons more experience doing hand layups. It’s harder to wet out the material completely without stretching it and introducing air bubbles, both of which weaken the final laminate.
Basic Steps for Hand Layup
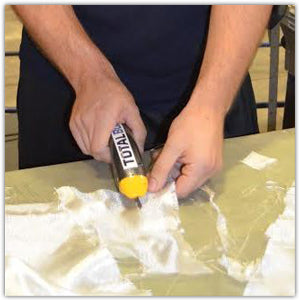
1) Cut the Laminants
2) Mix the Resin:
For best results, mix only as much resin as you can apply during the working time specified by the resin manufacturer. Measure carefully in order to achieve the proper cure. If improperly mixed, the unwanted results include no cure, soft cure, or shrinkage from too much heat caused by an excessive exothermic reaction.
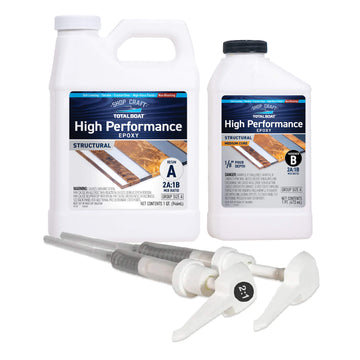
Measure and combine the epoxy resin and hardener in a clean container.
Mix thoroughly for approximately three minutes. Be sure to scrape the bottom and sides of the container to ensure all
Option if doing wet layup for a small fiberglass repair: After mixing the resin needed for the repair layup, create an additional small amount of thickened epoxy resin to use under the repair layup to smooth the prepared surface. After the thickened epoxy is applied, you’ll brush on a layer of unthickened epoxy resin before applying the layers of reinforcement material and wetting them out with the unthickened epoxy resin.
To make the thickened resin, pour a small amount of your mixed epoxy resin into a separate clean container, then add a thickening agent and mix thoroughly. Work quickly to mix the thickening agent because the mixture starts curing once the epoxy resin and hardener are combined.
Don’t be surprised if the epoxy resin absorbs a decent VOLUME of thickening agent before you achieve the desired consistency, which is typically like peanut butter.
After adding and blending the thickening agents into the mixed epoxy resin, use the stir stick to "wrap" the mixture evenly around the inside of the cup.
This action will reduce the amount of exotherm (heating process the resin goes through while curing), and increase the time you have to work with the thickened resin.
For best results and minimal waste, mix only as much resin as you can apply according to the indicated working time specified by the resin manufacturer.
Measure and combine polyester or vinyl ester resin and the MEKP catalyst in a clean container and mix thoroughly. Be sure to scrape the material along the bottom and sides of the mixing cup to ensure that all material is blended completely.
Any final coat of a polyester resin-based layup must contain wax in order to cure properly. Either use a finishing resin which has wax in it, or add wax to laminating resin.
Because of the danger involved, the resin manufacturer normally adds an accelerator or promoter to polyester resin so the resin cures at room temperature. If your polyester resin does not contain the accelerator, you must add the accelerator to the resin and mix thoroughly first, before adding and mixing in the MEKP catalyst. NEVER allow the accelerator and the MEKP catalyst to come into direct contact with each other or an explosion and/or fire can occur.
3) Coat Working Surface with Resin
On a surface covered with plastic sheeting, use a solvent-resistant roller or brush to coat the working surface with mixed resin.
4) Place Dry Laminant Ply onto Working Surface
Press the laminant gently into the resin.
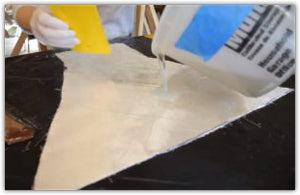
5) Pour Resin onto Laminant
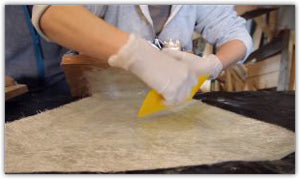
Use a squeegee or flexible plastic spreader to distribute the resin evenly. Continue spreading the resin until the material is saturated completely. This example shows the front side of a ply of nonwoven 1708 +/-45 biax being wet out with epoxy resin.
Optional: If you’re using just one layer to sheath a boat, roll the wet out material onto a heavy wooden stick or cardboard tube to make it easier to transfer to the boat surface.
Optional: If you’re creating a relatively small laminate stack, you can continue adding, positioning, and wetting out one ply at a time at this stage. After all plies are wet out, use a laminating roller to remove air bubbles and voids, and remove any excess resin with a plastic spreader, before transferring the stack to the mold or application surface.
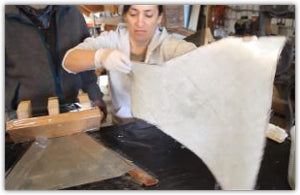
6) Transfer Laminant to Mold or Application Surface
Note: At this stage, if the wetted out ply or stack is going onto the boat surface, use a brush or roller to wet out the surface lightly with mixed resin before applying the material.
If needed, add more resin and distribute evenly. The example shows the other side of the ply of 1708 +/-45 biax with the chopped strand mat exposed. More resin is added to ensure this first layer is completely saturated. This step will not be necessary with successive layers because there will be sufficient resin for saturation.
7) Remove Trapped Air Bubbles and Voids
Use a ridged, laminating roller to remove any trapped air bubbles. This process is called compaction or consolidation.
8) Remove Excess Resin
Use a squeegee or plastic spreader to remove excess resin and wipe it off into a "grunge" cup.
These steps will vary based on your particular layup.
When doing a simple fiberglass repair, wet out the target surface with a layer of thickened resin, followed immediately by a layer of unthickened resin, to which you would begin adding the small laminant plies, dry, one at a time, and wetting out in place with the unthickened resin.
When sheathing a boat, allow the laminant layer to cure to a soft consistency, tacky to the touch, then start applying additional coats of resin to fill the weave of the reinforcement materials.
To do this, pour or brush on a coat of unthickened resin. Allow this fill coat to level the texture of the reinforcement material. Use a spreader to distribute this fill coat evenly across the surface.
Again, allow the epoxy to cure to a soft but tacky consistency. Apply the second fill coat of resin, and allow to cure completely before sanding and finishing.
Take care not to sand into the fiberglass or the color will change from clear to white, which indicates that you’ve weakened the structural strength of the glass fibers in that area. The whiteness will show through any final coats of epoxy, which is not good if you’re going for a natural finish.
For surfaces to be finished naturally, avoid excessive sanding because any over-sanded areas will be visibly lighter on recoating.
The build-up laminate layers are saturated in "laminating" resin, which does not cure completely in the presence of air. This is necessary to achieve sound primary bonds in the laminate.
However, the final laminant layer should be saturated in a polyester or vinyl ester "finishing" resin, which contains wax.
The wax prevents all air exposure to the surface of the laminate and allows it to cure properly.
If the polyester or vinyl ester resin doesn’t contain wax, and you want the finish coat to cure properly, you can either coat the final laminant layer with PVA (polyvinyl alcohol) or use vacuum bagging to make the cure happen.
Comments
0 comments
Please sign in to leave a comment.